
Photo by Tech Daily on Unsplash
How to Integrate Huawei's UserDetect to Prevent Fake and Malicious Users


Table of contents
Background
Recently, I was asked to develop a pet store app that can filter out fake users when they register and sign in, to cut down on the number of fake accounts in operation. I was fortunate enough to come across the UserDetect function of HMS Core Safety Detect at the Huawei Developer Conference, so I decided to integrate this function into this app, which turned out to be very effective. Currently, this function is free of charge and is very successful in identifying fake users, helping prevent credential stuffing attacks, malicious posting, and bonus hunting from fake users.
Now, I will show you how I integrate this function.
Demo and Sample Code
The HUAWEI Developers website provides both Java and Kotlin sample code for the UserDetect function and other four functions of Safety Detect. Click here to directly download the sample code. You can modify the name of the downloaded sample code package according to tips on the website, and then run the package.
Here is my sample code. Feel free to have a look.
Preparations
Configuring the Huawei Maven Repository Address
The procedure for configuring the Maven repository address in Android Studio differs for Gradle plugin versions earlier than 7.0, Gradle plugin 7.0, and Gradle plugin 7.1 or later. Here I use version 7.1 or later as an example.
Note that the Maven repository address cannot be accessed from a browser and can only be configured in the IDE. If there are multiple Maven repositories, add the Maven repository address of Huawei as the last one.
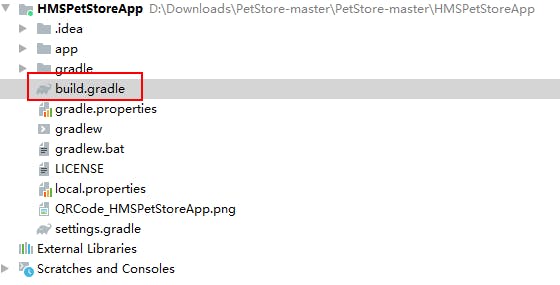
Open the project-level build.gradle file in your Android Studio project.
If the agconnect-services.json file has been added to the app, go to buildscript > dependencies and add the AppGallery Connect plugin configuration and Android Gradle plugin configuration.
 buildscript {
     dependencies {
         ...
         // Add the Android Gradle plugin configuration. You need to replace {version} with the actual Gradle plugin version, for example, 7.1.1.
         classpath 'com.android.tools.build:gradle:{version}'
         // Add the AppGallery Connect plugin configuration.
         classpath 'com.huawei.agconnect:agcp:1.6.0.300'
     }
 }
 plugins {
     ...
 }
Open the project-level settings.gradle file and configure the Maven repository address for the HMS Core SDK.
 pluginManagement {
     repositories {
         gradlePluginPortal()
         google()
         mavenCentral()
         // Configure the Maven repository address for the SDK.
         maven { url 'https://developer.huawei.com/repo/' }
     }
 }
 dependencyResolutionManagement {
     ...
     repositories {
         google()
         mavenCentral()
         // Configure the Maven repository address for the SDK.
         maven { url 'https://developer.huawei.com/repo/' }
     }
 }
Adding Build Dependencies
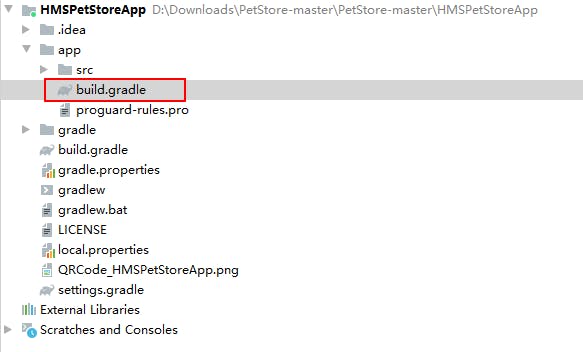
Open the app-level build.gradle file of your project.
Add the AppGallery Connect plugin configuration in either of the following methods:
Method 1: Add the following configuration under the declaration in the file header:
apply plugin: 'com.huawei.agconnect'Method 2: Add the plugin configuration in the plugins block.
  plugins {
      id 'com.android.application'
      // Add the following configuration:
      id 'com.huawei.agconnect'
  }
Add a build dependency in the dependencies block.
 dependencies {
     implementation 'com.huawei.hms:safetydetect:{version}'
 }
Note that you need to replace {version} with the actual SDK version number, for example, 6.3.0.301.
Configuring Obfuscation Scripts
If you are using AndResGuard, add its trustlist to the app-level build.gradle file of your project. You can click here to view the detailed code.
Code Development
Creating a SafetyDetectClient Instance
// Pass your own activity or context as the parameter.
SafetyDetectClient client = SafetyDetect.getClient(MainActivity.this);
Initializing UserDetect
Before using UserDetect, you need to call the initUserDetect method to complete initialization. In my pet store app, I call the initialization method in the onResume method of the LoginAct.java class. The code is as follows:
@Override
protected void onResume() {
    super.onResume();

    // Initialize the UserDetect API.
    SafetyDetect.getClient(this).initUserDetect();
}
Initiating a Request to Detect Fake Users
In the pet store app, I set the request to detect fake users during user sign-in. You can also set the request to detect fake users in phases such as flash sales and lucky draw.
First, I call the callUserDetect method of SafetyDetectUtil in the onLogin method of LoginAct.java to initiate the request.
My service logic is as follows: Before my app verifies the user name and password, it initiates fake user detection, obtains the detection result through the callback method, and processes the result accordingly. If the detection result indicates that the user is a real one, the user can sign in to my app. Otherwise, the user is not allowed to sign in to my app.
private void onLogin() {
    final String name = ...
    final String password = ...
    new Thread(new Runnable() {
        @Override
        public void run() {
// Call the encapsulated UserDetect API, pass the current activity or context, and add a callback.
            SafetyDetectUtil.callUserDetect(LoginAct.this, new ICallBack<Boolean>() {
                @Override
                public void onSuccess(Boolean userVerified) {
                    // The fake user detection is successful.
                    if (userVerified){
                        // If the detection result indicates that the user is a real one, the user can continue the sign-in.
                        loginWithLocalUser(name, password);
                    } else {
                        // If the detection result indicates that the user is a fake one, the sign-in fails.
                        ToastUtil.getInstance().showShort(LoginAct.this, R.string.toast_userdetect_error);
                    }
                }
            });
        }
    }).start();
}
The callUserDetect method in SafetyDetectUtil.java encapsulates key processes for fake user detection, such as obtaining the app ID and response token, and sending the response token to the app server. The sample code is as follows:
public static void callUserDetect(final Activity activity, final ICallBack<? super Boolean> callBack) {
    Log.i(TAG, "User detection start.");
    // Read the app_id field from the agconnect-services.json file in the app directory.
    String appid = AGConnectServicesConfig.fromContext(activity).getString("client/app_id");
    // Call the UserDetect API and add a callback for subsequent asynchronous processing.
    SafetyDetect.getClient(activity)
        .userDetection(appid)
        .addOnSuccessListener(new OnSuccessListener<UserDetectResponse>() {
            @Override
            public void onSuccess(UserDetectResponse userDetectResponse) {
                // If the fake user detection is successful, call the getResponseToken method to obtain a response token.
                String responseToken =userDetectResponse.getResponseToken();
                // Send the response token to the app server.
                boolean verifyResult = verifyUserRisks(activity, responseToken);
                callBack.onSuccess(verifyResult);
                Log.i(TAG, "User detection onSuccess.");
            }
        })
}
Now, the app can obtain the response token through the UserDetect API.
Obtaining the Detection Result
Your app submits the obtained response token to your app server, and then your app server sends it to the Safety Detect server to obtain the detection result. You can obtain the user detection result using the verify API on the cloud.
The procedure is as follows:
Obtain an access token.
a. Sign in to AppGallery Connect and click My projects. Then, click your project (for example, HMSPetStoreApp) and view the client ID and client secret on the Project settings page displayed.
b. Use the client ID and client secret to request an access token from the Huawei authentication server. You can find out more details in the "Client Credentials" chapter on OAuth 2.0-based Authentication.
Call the Safety Detect server API to obtain the result.
The app will call the check result query API of the Safety Detect server based on the obtained response token and access token. You can visit the official website for details about how to call this API.
The app server can directly return the check result to the app, which will either be True, indicating a real user, or False, indicating a fake user. Your app can respond based on the check result.
Disabling UserDetect
Remember to disable the service to release resources after using it. For example, I call the disabling API in the onPause method of the LoginAct.java class of my app to disable the API.
@Override
protected void onPause() {
    super.onPause();
    // Disable the UserDetect API.
    SafetyDetect.getClient(this).shutdownUserDetect();
}
Conclusion
And that's how it is integrated. Pretty convenient, right? Let's take a look at the demo I just made.
You can learn more about UserDetect by visiting Huawei official website.